Introduction
Step 1: Getting the Template
Start by navigating to the Manage screen. When viewing the Member Tab, hover over the button that reads "Import" and select "From CSV". On next menu, click download under "Get Sample Upload File".
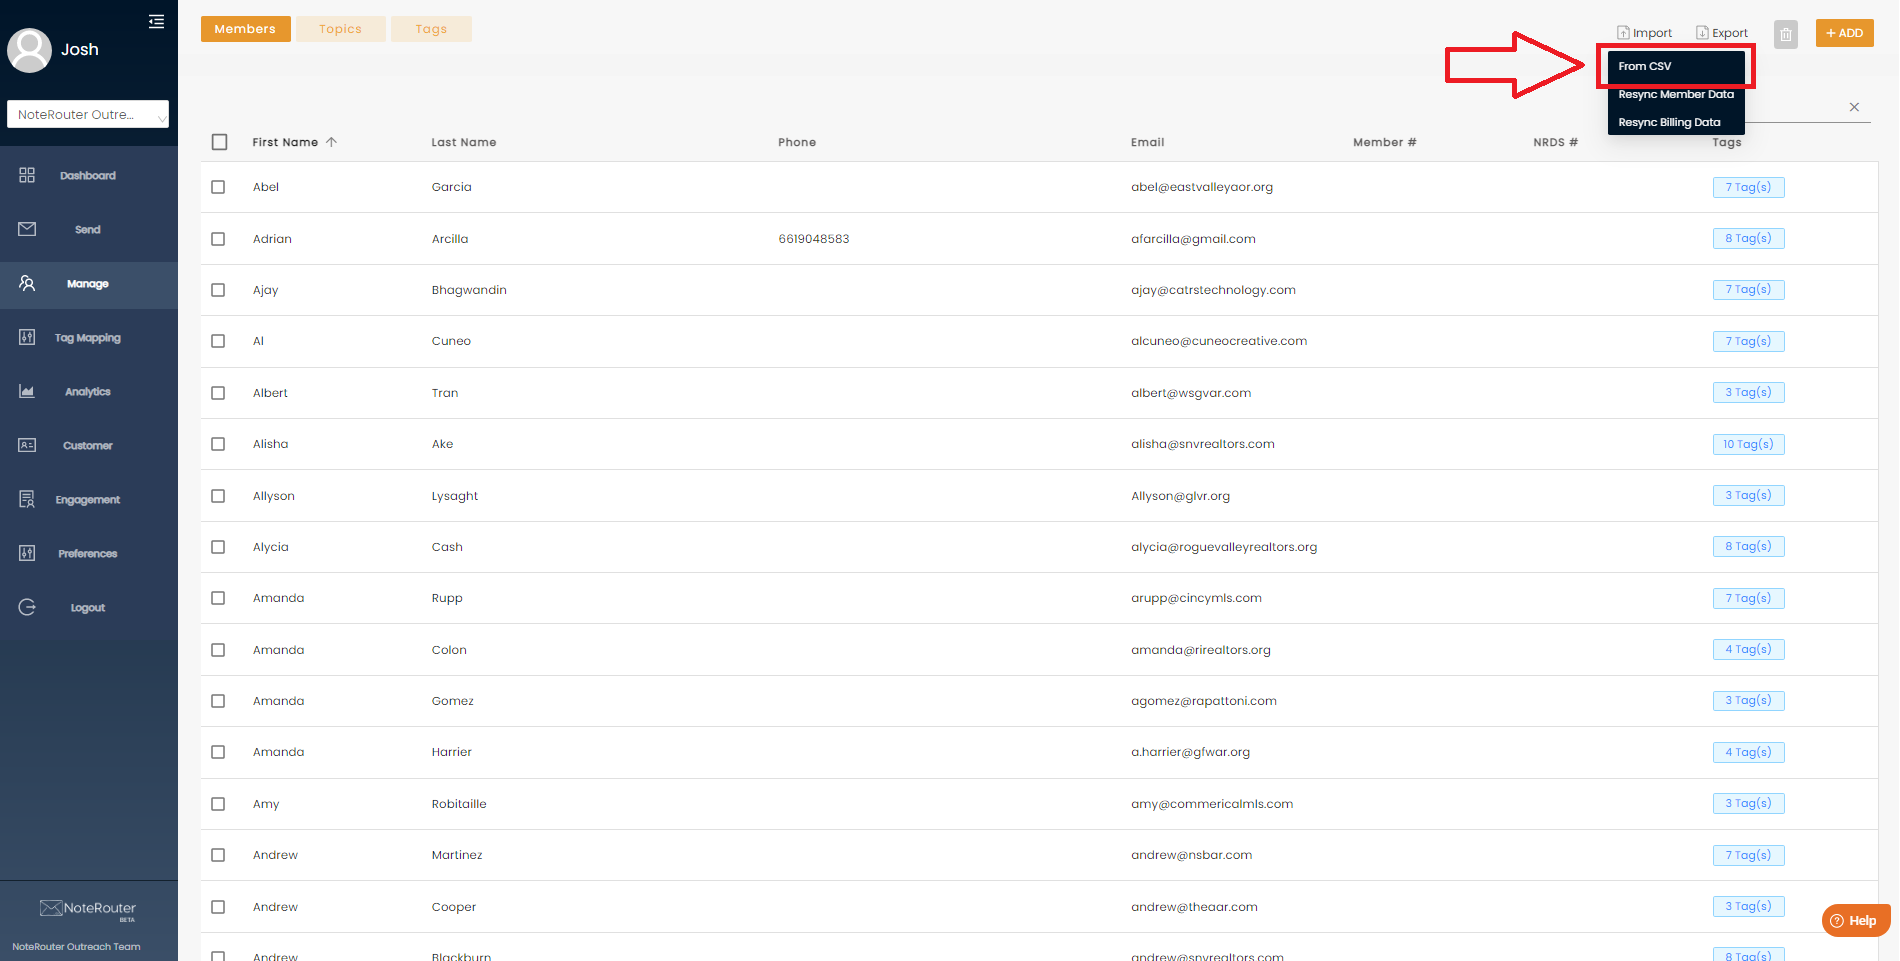
^Location of the "From CSV" option.
Step 2: Member Data
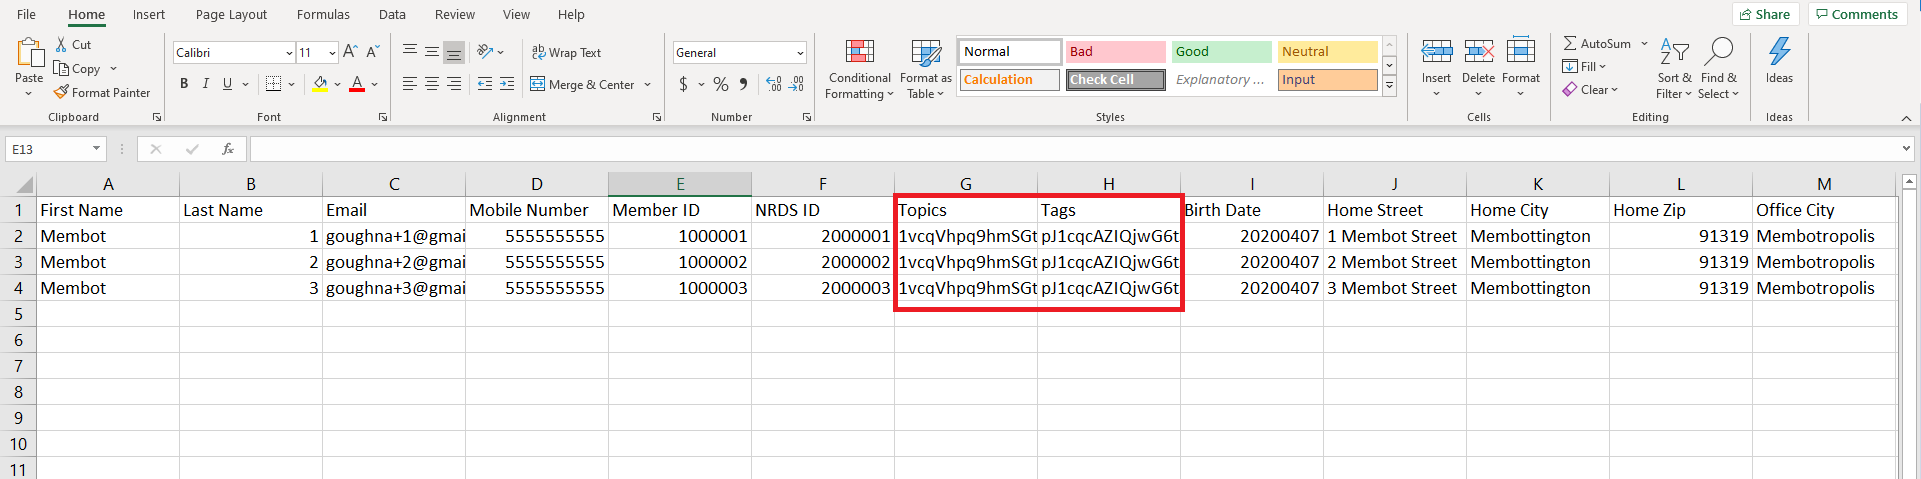
After downloading the NoteRouter CSV Template, copy your own member data over into the appropriate columns. The information provided is there as an example, and should be deleted before submitting your data. While you don't need to include all data, it's recommended to include Full Name and at least one or two unique identifiers. (NRDS or Member ID, Unique Email, etc.)
Step 3: Topics and Tags
 This works similarly for both Topics and Tags. Their IDs are located at the top of their respective pop-out panels.
Note:  If you're assigning multiple Tags or multiple Topics to each member, separate the IDs with a comma.

Example: Cs1nuOn1oucH67nsVvl6,jmBsF0SFpxEI5XbX6rTc,k0FQMH2mVu6y3qB2WNJ2
Step 4: Upload the completed file
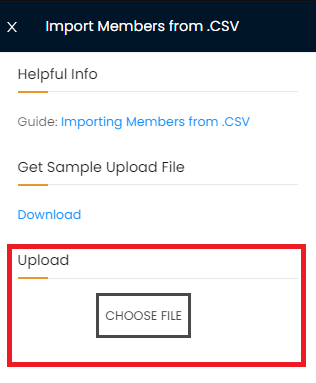
Navigate to the same area where we downloaded the sample file in Section 1 to upload your finished version. Select "Choose File" and select the correct completed file from your computer.
Congrats! You should receive a message letting you know about the status of the update once it's complete. Feel free to contact us at support@noterouter.com if you run into any issues or need a hand at any point during the process.